Showing posts with label Craigslist. Show all posts

Campaign Dresser re-do


 Hey People! Sorry for the LONG time away. We are now "almost" fully settled in BEAUTIFUL Colorado! We are in a suburb outside of Denver and seriously loving it. Every day we thank God for allowing us to live here!!
I have seriously been a creative maniac since we moved in here. Moving from CA to CO we more than doubled our square footage in our home which is a HUGE GINORMOUS blessing, but also a challenge to decorate and plan the spaces since we have so much more space now. We have an ENTIRE basement that I haven't even touched. The space is empty! So if ya'll see any amazing basement spaces that you think I'd like PLEASE send them my way! Ok so I have a lot...and I mean a LOT of projects to share with you guys. Too many honestly to share in one post so I'm gonna start with a dresser that I scored for free on CL when I was still in CA and hauled it to CO. This thing was in pretty amazing shape. It doesn't have the typical campaign pulls that totally sink into the casing...but I didn't care...free is a very good price! Here's the dresser in its "Ohnoiwanttostartthisprojectbutiforgottotakeabeforepic state"


It wasn't in that bad of shape. Just needed a quick sand, prime, and paint. One of the easiest re-do's I've done in a while! Here's the super sassy after...
I used a really pretty deep blue gray oops paint and Shellac clear coat that I already had. This project was CHEAP! Soaked the amazing campaign hardwear in vinegar and it brightened it up just the right amount. I'm in LOVE with this dresser! I actually gave my daughter my old dresser so I could use this one instead. I love it!!!
The lady that I got it from was the SWEETEST lady ever. She totally didn't think I'd want the dresser because its "Old" and no one else had wanted it! lol if she only knew...she also gave me the cutest drop leaf kitchen table that was her parents kitchen table when they were married. This lady was over 80 years old...so the drop leaf table is at least 150 years old if not older...and what amazing shape its in!

See what I mean? I haven't decided what to do with it yet. The leaves are not the strongest ever and my kids love to pull on the table as they climb in and out of their chairs so I'm just hoping they don't pull the table on top of them one of these days! Oh and check out those chairs...those are a sneak peek...posting about them next week. I hope you all like my new dresser! What do you think I should do with the table? Paint? Stain? Its bare wood except for a thin layer of orange oil. I hope you all have a fabulous week!!!

One of my FAVE dresser redo's EVER...


Hey people!!!! Ok here is a dresser in its pre-fabtastic days. Picture those drawers actually inside that case and not sanded m'kay? This dresser was on CL...only about 10 mins from my house...and they had it listed for 20 bucks. Now THAT would've been a great price...but I always offer less to see if they'll take it. I offered the guy 10...he was stoked...I WAS MAJORLY STOKED! ;)
This dresser is one of those iconic mid century modern styles that everyone has seen...and everyone loves. The molded drawer handles...the cute stubby feet...the height is perfect! I just love this style! 
Now the picture on the right is after I had already sanded the drawers with 80 grit and then 120 grit to remove the old finish. The drawers were in totally decent shape (except for some MAJOR gluing that was needed)...the frame...was...not. I would've LOVED to be able to keep the frame in its original wood but there were several chunks of missing veneer...several LARGE scratches in the veneer that I knew would be hard to cover with stain and have not show. So I went to my FAVE resource for mid century furniture re-do inspiration....enter Design Sponge! I searched before and after pics of dressers and found this...

This is what I'm talking about! Beautiful wood grain...outlined with crisp white! So pretty and modern and funky! I knew I would shamelessly copy them since their case was in bad shape too but their drawers were salvageable. I did have to do some major repair on pretty much every drawer. The wood was in really good shape but the drawers handles were all cracked...the trim was coming up...so i used A LOT of wood glue and put everything back together again. So after thoroughly sanding the drawers (see above pic for the pretty raw wood that I ended up with)...I applied a thick layer of Howard's Feed and Wax to the drawer fronts. Here is a pic of the before the wax and after...


Insane huh? I was AMAZED at how awesome that stuff is and how it brought out all that fabulous wood grain and color with just a layer of citrus smelling wax! Adore Howards...I will be using it from now on! 

So after the drawers were waxed and polished I filled all the scratches and holes in the case veneer with wall spackle. (I use it instead of wood putty...MUCH cheaper and works just as well...and MAJORLY sandable)...let that dry and then primed and painted the box with two coats of oops white paint. I left the feet in the raw wood for some variety. Here's the after.... 


Sharing my dresser at some fab parties:


Photobucket

Funky Junk's Saturday Nite Special

Gray bench redo

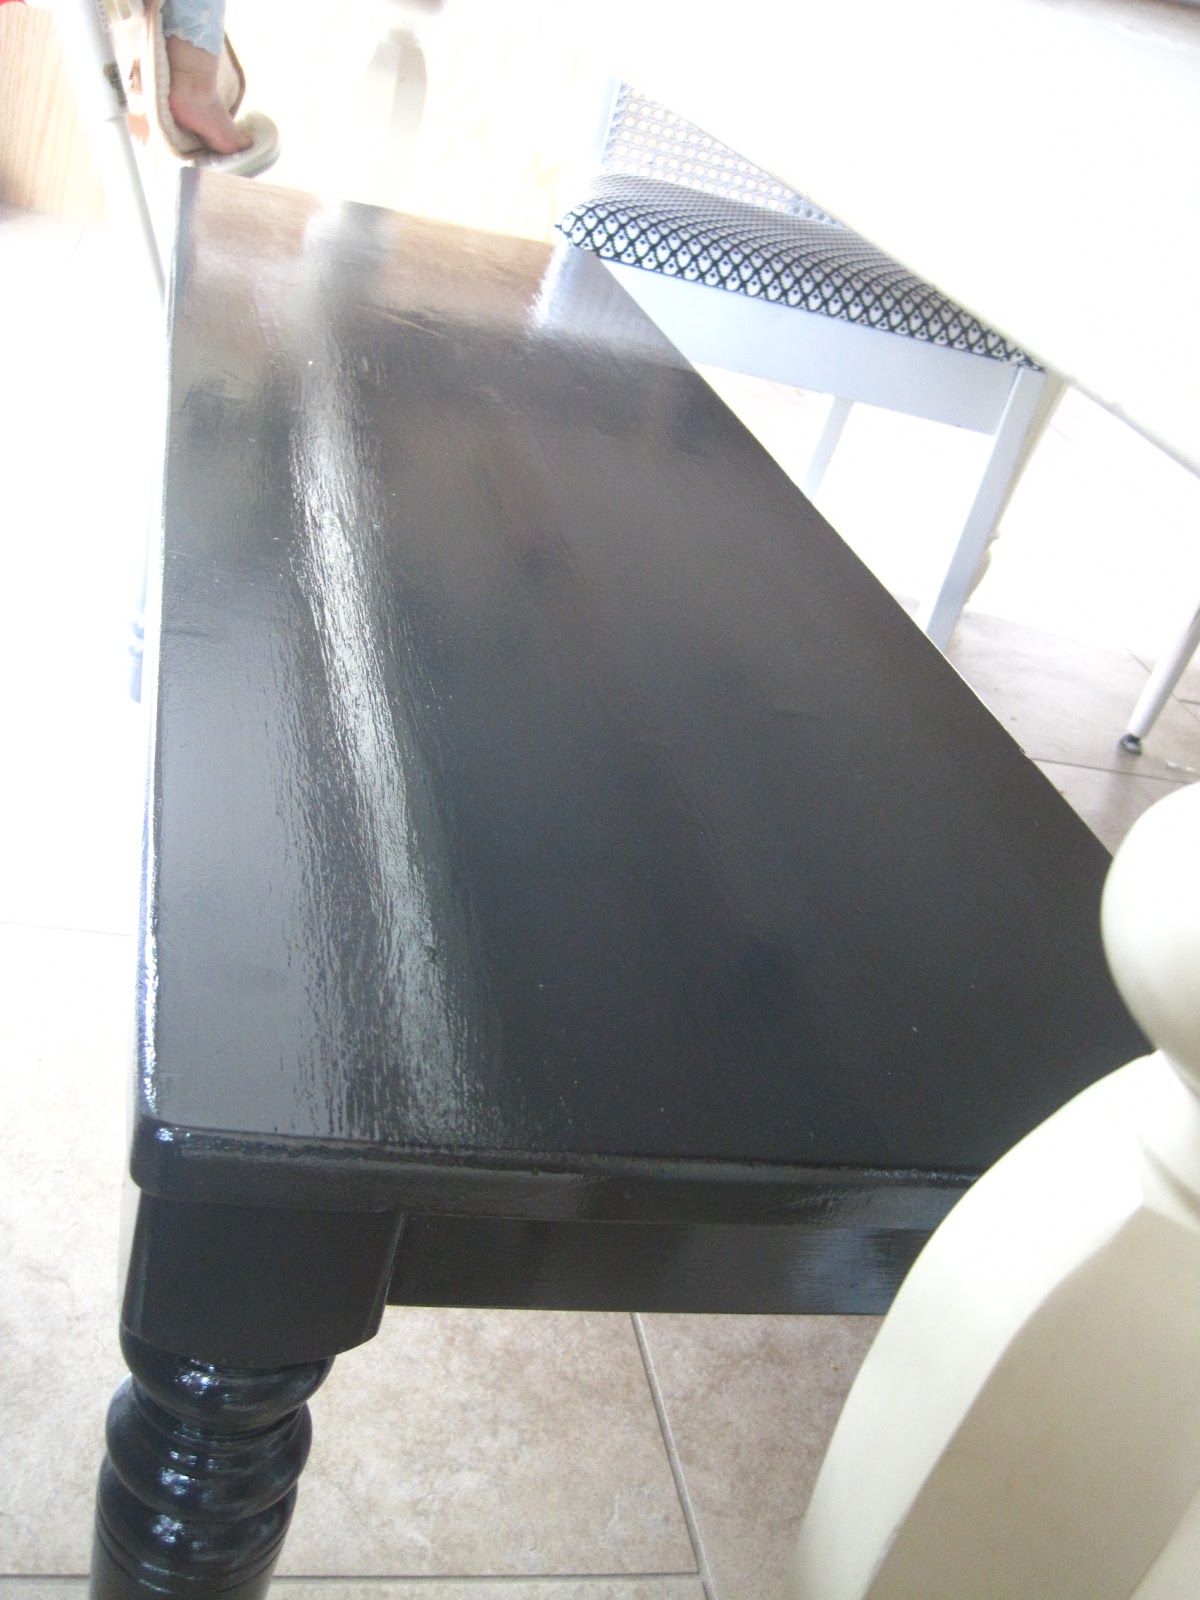
Hey everyone! So I just refinished a bench. No big deal...but I wanted to share it with you! I had been looking for a bench for a LONG time. I wanted one to go on one side of my dining table so my kiddos could share it. I wanted NO upholstery...totally wipable and kid proof...and a dark gray-ish black color. Well have any of you tried to find a bench on CL and not pay a fortune? Its almost impossible!!! You could make one yourself for not much money thanks to The fabulous Ana White. 
But I wanted one pre-made...SOLID...kinda ugly but good bones...and CHEAP CHEAP CHEAP! Well the other day when I was perusing Craigslist I found my bench. 15 bucks and the perfect size!
Pardon the partially primed top. I was DETERMINED to be a good blogger and take a before pic...and I ALMOST forgot! Phew.  Ok so you can see...sturdy...kinda gross looking...good bones! Just what I wanted to be able to make it glam and functional!
So here was my process...
Sand the top thoroughly with the palm sander.
Wipe clean
Prime that sucker
Dry time
One coat of my most favey fave new color...
Dry....
Another coat of the above super rad color
Dry
SHELAAAAC like crazy a few times with adequate dry times in between of course...I wanted this thing to be tough as nails!

So after that whole process I decided to let it simmer in the garage and get less fumey before I exposed my kids to it. Now its in the house and we LOVE it.
Oooh....Aaaaaah! What is it about a bench with a shiny top that just makes my heart sing? I adore this thing...such an easy makeover but so practical for our family and all those sticky fingers! Love you guys! Hope you have an awesome week!!!

Linking up with my fellow partiers:

DomesticallySpeaking

Refinishing a Mid Century Modern dresser part 2

Hey there! Sorry this post is slightly delayed. I had major issues with this beast of a dresser but PHEW its done now! Ok so in part one of this journey I showed you guys the demolition process of this re-do...the gritty...not pretty...but VERY necessary steps to getting this dresser ready to be painted and shined! So...diving right in....
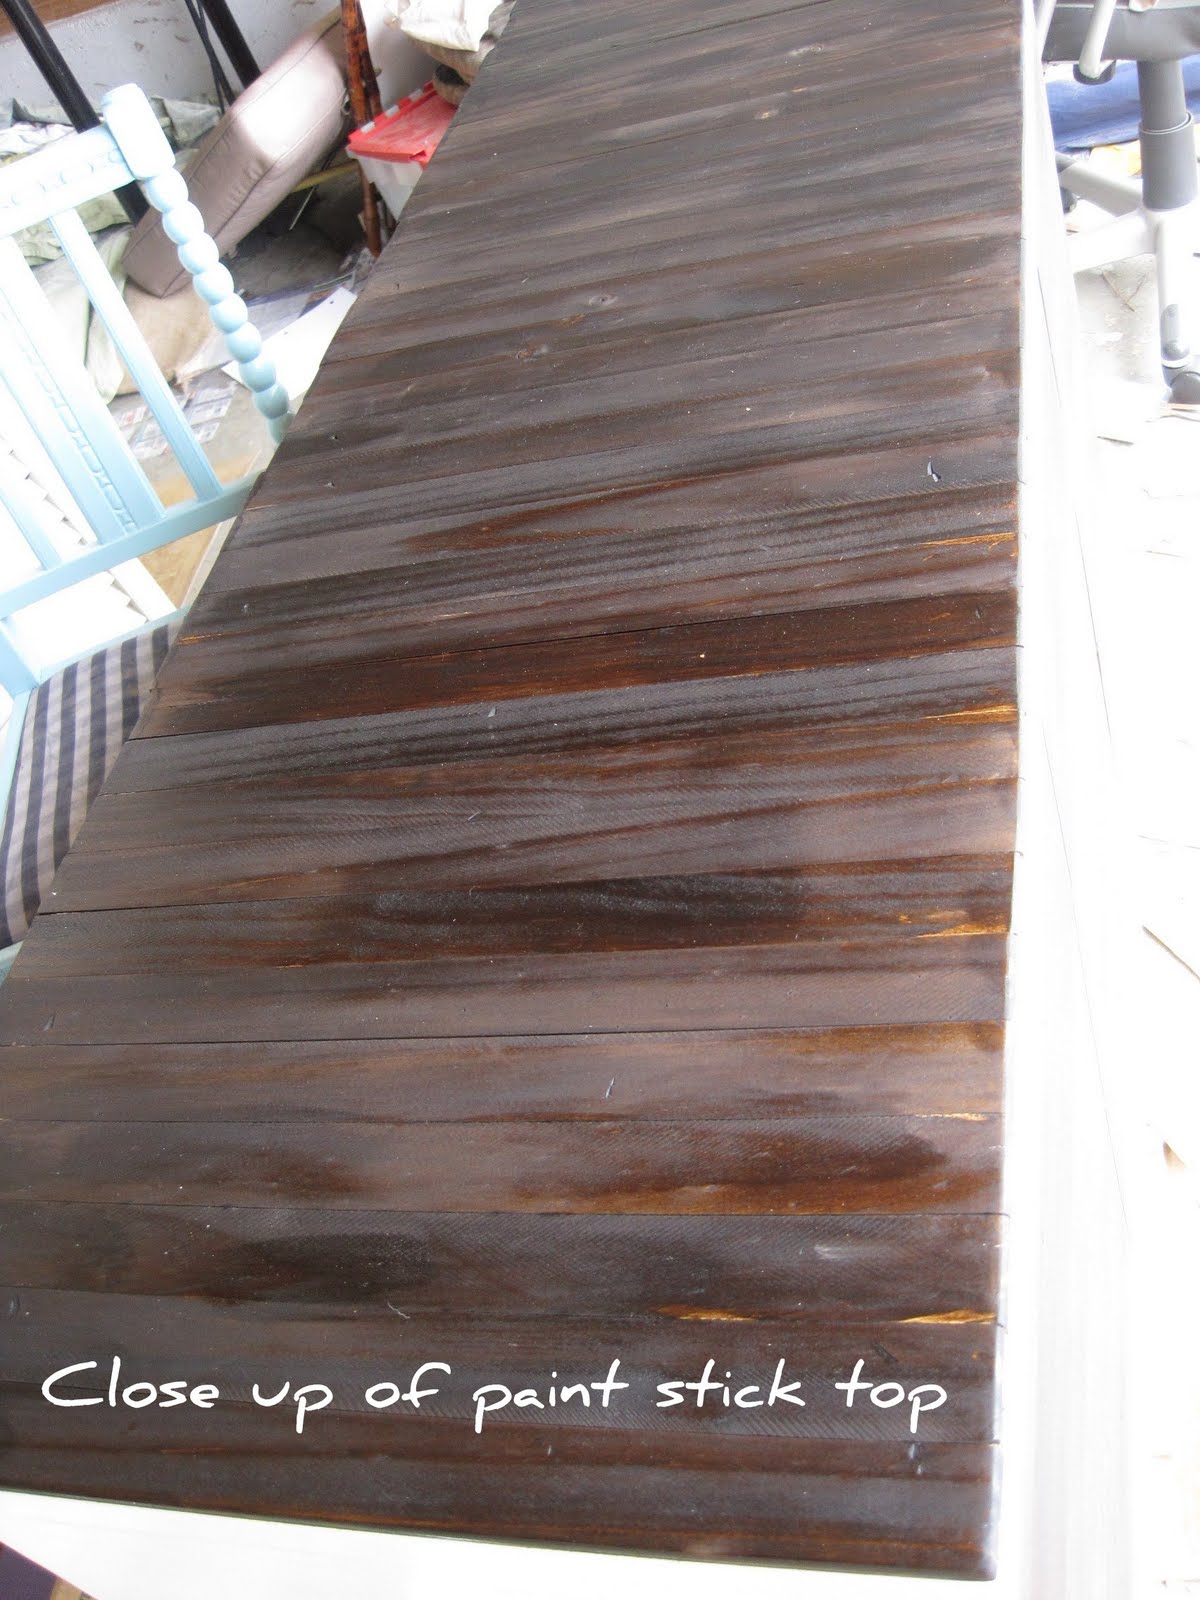
After I stripped ALL the laminate off the dresser on the fronts, top, sides, etc I sanded it all down really well...starting from 80 grit and then 120...so that I had a nice smooth surface to start with. I then put on a thin and even coat of primer on the dresser body but left the top and drawer fronts bare since those were gonna be stained. I didn't take a picture of this step but I just made sure the primer coat was light and even...I prefer Zinser primer...its what Centsational girl uses...and it really does work awesome. Super grippy and smooth looking under the paint. I let the primer dry over night and in the meantime I stained all the drawer fronts with Minwax liquid stain in Dark Walnut. I only did one coat on the drawer fronts...the wood was really pretty underneath and I wanted that to show thru a bit. I then laid out my plank top (paint sticks) and started gluing. There isn't really any rhyme or reason to applying the top. I just drizzled Gorilla wood glue liberally on the dresser top a little at a time (it dries fast) and then put the sticks evenly on the top...making sure that they were smooshed up next to each other completely before moving on to the next one. I also used paint cans to keep them flat during the drying process. As they dry the ends tend to lift a little...make sure you put something heavy on there and really concentrate on keeping the ends flat. Here she is with the unfinished paint stick top..

Cool huh? I really loved it in its bare and naked state but alas...I'm in love with dark stains! So after the top of the dresser was totally covered I gave it a couple days to fully cure before I did the staining. I applied the same Minwax stain to the top. I normally apply stain using a t-shirt or rag but I used one of my Purdy paintbrushes this time to get a thicker and more even application. I LOVE how it turned out. I let each coat cure for about 25 mins before I wiped it off...let it sit for a few hours...and applied the next coat. I did a total of two coats on the top. While the top was curing I painted the sides and front of the box with an oops white paint that I had in my stash.
See the bottom part...well that had a thin cardboard like panel that originally covered it and made it a solid section..but the moisture had damaged that part beyond repair so I simply removed that and sanded down the frame. I LOVE the modern edge it gives the dresser...and its solid wood too so no worries about durability! So this is the box with one coat of paint on it...get ready....I'm about to reveal the dramatic "after" pictures...are you ready? You sure? Ok here you go...


TA DAHHHHH!!!!!! Ok so you guys are probably wondering what I used for my handles on the dresser...well that was kind of a happy accident. I searched all over for modern handles that fit the overall look that I was going for, were cheap, and just happened to have the same width holes that the old ones did. Well I couldn't come up with anything that would work. I was majorly bummed and thinking that I would have to drill new holes and just settle for something that I didn't really love...when I remembered seeing different dressers that people have done that use rope or ribbon in place of handles in the drawers. Well that sparked a MAJOR bonfire of creativity and I remembered that I had a huge bundle of scrap leather pieces that would work AMMMAAAAZING in place of handles....plus they are stiff and will hold their shape well! Yay for using what you already have!! The leather pieces that I have are strips...all the same length so all I needed to do was cut them each in half and use one half for each handle. I widened the holes in the drawers just a tad so I could get the strips (which I trimmed the ends a bit to get it to fit) through the holes. Once I had about 3/4 an inch through each hole I simply folded it flat against the inside of the drawer front and stapled it firmly in place. I did this 9 times...and MAN was it tiring...especially with my kids running around me the whole time! The payoff was HUGE though and I could not be happier with how it looks! Its a little modern...a little funky...and it was TOTALLY FREE! I hope you guys love it as much as I do! I'd love to hear your thoughts!!!

Partying it up @
Furniture Feature Fridays
The Shabby Nest


Funky Junk's Sat Nite Special


All things furniture @ Perfectly Imperfect

Catch As Catch Can

Refinishing a Mid Century Modern dresser part 1

Hey ladies and gentleman! So I was perusing good ol' Craigslist the other day and I happened upon a post in the free section that read "Old dresser for free. Peeling veneer. Bad shape. Come pick it up" Well like any good DIYer out there I was not scared by the words "peeling veneer...or bad shape" I just saw the word "old" and was instantly intrigued! So I called the lady when the post was only about 5 mins old and she told me she'd hold it for me. I went and got it and was smitten by the complete amazing-ness of this dresser. It is not my normal style. Its boxy...and very mid century modern-y. I generally tend to gravitate towards french provincial and similar shapes so I was kinda excited to work on something that was out of my element. The veneer was in HORRIBLE shape. This dresser had apparently sat in the rain for 6 months...and if any of you know much about Oregon...it does in fact rain for 6 months straight. So this dresser got LOTS of abuse sitting in the elements. I knew the veneer could not be saved so I decided to remove it. Here it is in its partially deconstructed state

When all the drawers are shut it looks like it has 9 small drawers but its actually 3 large drawers on the left and 3 small drawers on the right. Super cool!
Check out the original pulls. LOVE!
You will need one of the above if you are gonna tackle a project like this. This tool is about 5 bucks at HD and is worth every penny. It works great at spackling, filling holes, opening paint cans, making small "distress marks" in the tops of tables and such to give it character. It seriously rocks!
So to remove the bottom veneer I just had to basically peel it off..it was falling off and chipping and it was easy peasy to get it off the rest of the way. For the top it was a HUGE pain. I started with the corner and started just scraping at the veneer. Some spots would come off easily and I could grab onto it and peel it the rest of the way...but some spots I literally had to chisel off tiny pieces at a time. It was SO frustrating. This is not a project for the faint of heart! And in one spot my hand slipped and stabbed a piece of veneer into my finger and gave me a BAD cut. That stuff is friggin sharp! So after I started getting a cramp in my arm from all the chiseling I decided to consult my good friend google and see if there was a better way. Google told me to spray the veneer LIBERALLY with white vinegar...let it sit for a few...and then try again. Well it works, but not well. It comes off a tad easier and it comes off in bigger chunks but its still a royal pain in the booty! Unfortunately there is no shortcut to this project.
Ok so now that you are all thoroughly depressed...I'll tell you the good news! I went to HD today to look for a new top for the dresser. I wanted something super thin...maybe wood planks? But I wasn't sure. I looked around and there really wasn't anything that struck me as being good for this project. I kept coming back to wood planks though and none of the wood that they had was the right thickness. I was thoroughly bummed until I strolled past the paint department and spied the paint stir sticks. Hm....(wheels turning)...this is the perfect thickness...and the perfect width...but I would need a TON of these things to cover the whole top of the dresser. Well I had the measurements of the top handy and I compared the length that I needed with the length to one of the SUPER long big daddies of paint sticks. Um ya...PERFECT! The part of the stick that goes in and makes the handle...if you were to cut that part off it'd be the exact perfect length for the dresser top!!!! Cut to me GRINNING LIKE A FOOL! So I sweetly told the paint counter chick what I was planning on doing...I then told her about how perfect those big daddy sticks would be...I then asked her to measure the width of them and tell me how many I would need to cover the whole top of the dresser...Um ya that'd be 62! So I then watched her grab a BOX of big daddy sticks down from the shelf and start counting out 62 of them for me! I could not be more in love with this idea...and HD for making it FREE and possible! I then decided to "sweetly" con one of the lumber guys into cutting all the sticks for me. (probably would've been a good idea to dress a little cuter next time) I finally tracked down a kid in the lumber dept and he was more than happy to cut them all  for me. LOVE him! So the dresser was free...the big daddy sticks were free....the cutting was free...all I had to buy was some wood glue to glue those suckers down and some more Dark Walnut stain. Yup I'm probably the cheapest DIYer ever! Part 2 will show you the refinishing process and how I beautified this beast! Stay tuned people!

Refinished dining table

Hey everyone! Sorry for the lack of inspiring posts lately...I've been sick...like on my deathbed with a pile of nasty kleenex next to me sick! Worst cold in A LONG TIME! I'm just praying that my family doesn't get it. So the one thing that I have done lately (that's worth blogging about) is my dining table re-do. I did a two toned look with a white bottom and a dark stained top (Miss Mustard Seed would be proud...I hope :) I love how this came out...like LOVE! I don't have a proper before pic because I suck...but here's the glamorous after!!!


I stripped the old stain and about 75 layers of chunky polyeurethane off the top and then worked my way from 80 grit to 220 grit with my trusty palm sander. Then I stained the top 3 times with a mixture of Minwax Dark Ebony and Dark Walnut stain. (the combo of both of those is TO DIE FOR...seriously the best color evah!) I let the stain cure for 2 days then poly coated the top 3 times and the base (which was painted with a creamy white oops paint and distressed) 1 time. I love how she turned out! I'm probably gonna sell her because I really have my heart set on a rectangular dining table that will seat at least 6...but in the meantime she sure is pretty to look at. I hope you all have an amazing Easter!!

I'm partying....
Weekend wrap up party @ Tater tots and Jello
Saturday Night Special @ Funky Junk Interiors
Sunday Scoop@ I love naptime with chocolate sundays
One Project at a time @A Bowl Full of Lemons
Nifty Thrifty Tuesday @ Coastal Charm
Anything Goes Party @Type A Decorating


My french provincial dresser found its soul mate!!

Yes that's right...I happened to find the exact matching night stand for my French Provincial Dresser . 
I am beyond pumped!! I scored it on craigslist for 10.00!! I considered doing the two toned look on it so it would perfectly match the dresser but matchy matchy is SO tacky tacky and I wanted something a little fun and sassy! I recently refinished a nightstand for my hubby's side of the bed...check it out here and this loverly lady will be on MY side of the bed. I very stupidly didn't take a before picture but it was the style that you all have cemented into your worst nightmares...beige with gold trim! GAH! Anyways here she is all gussied up and I think MUCH better!


That last photo is of my adorable baby girl who is almost 9 months! Wow how time flies. Anyways back to the nightand...
I sanded lightly all over with my trusty palm sander, then I painted two coats of a creamy white oops paint, distressed her, and then glazed over the distressing. I then painted the inside and outside of the drawer in a bright peacock blue color, and spray painted the hardwear charcoal gray. I J'adore her!! She will make my new bright yellow lamp look even more amazing! Oh I didn't show you guys my yellow lamps yet? Next post!

I'm partying at....


Furniture Feature Fridays


Photobucket
Chic on a Shoestring Decorating
Funky Junk's Saturday Nite Special

Join  us Saturdays at tatertotsandjello.com for the weekend wrap 
 up           party!