Helloo lovely readers!!! Just wanted to share a recently completed project with ya'll. My hubby and I were SO excited/confident after we built our Farm Table that we decided to tackle a rustic bookshelf. I was majorly inspired by this one. Check it out. (Our Vintage Home is a treasure trove of awesome DIY ideas! I was actually about to copy the same bookshelf from Restoration Hardware when I saw their version and I loved it SO much!!) We have a lot of books! Not like "hoarders"..but we like to read so we buy books. We have been relying on one small bookshelf for about a year now because...lets face it...bookshelves are expensive unless you go the rickety Ikea route. We wanted solid wood. I have two demolition derby toddlers and I want it to be sturdy!! Well I've been a busy bee accumulating pallet wood and various scrap wood lately and I was determined to build this bookshelf out of wood that I already owned. So I got to work during my kids nap (in 90 degree weather I might add) disassembling pallets to build the bookshelf. I spent two hours, got about 5 slivers, and sweated profusely before I realized that the wood I was getting off these pallets wasn't going to be strong enough...or straight enough...to build the shelf. FAIL. So off to home depot I went with my measurements in hand and supplies list to see if I could score some inexpensive wood. I knew I wanted to shelf to have a "planked" look rather than being super clean and perfect. I wanted it to look like I made it with nasty old barn wood. I ended up buying two 1/12's for the top and bottom shelves and as I was waiting at the wood cutting machine in Home Depot I was in EXTREMELY close proximity to the overflowing with awesome-sauce wood "cull lumber bin". Have you seen the cull bin? Get thee to HD or Lowes and scavenge like a vulture!! Seriously awesome wood to be had in those bins. And the best part is it is CHEAP! Like 50 cents a board cheap! They had just refilled the bin that day...and they had refilled it with RED CEDAR (yes I'm shouting!). And did I mention that the length of those beautiful boards was the exact length I needed? Yup pretty much awesome! It was thick too...and had beautiful imperfections that you just can't create easily (and to think that the imperfections that I was wanting was WHY it ended up in the cull bin to begin with...SCORE!)
So when I got home with all my supplies my hubby and I started building. I decided to splurge and use rebar for the backs of the shelves so the books didn't fall off. I love the industrial vibe it added. And we also got some super cute small metal casters for the bottom so we could move it easily.
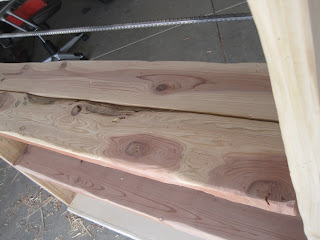
 This is a close up of the wood sans stain or poly. So pretty and unusual!
 Here's the shelf pretty much built with no stain and the rebar in place. If you want step by step instructions for putting this thing together go to Our Vintage Home's site...they did a great tutorial!
We were gonna use the pocket hole system that we used on our table but we just didn't have the energy and wanted it to look rustic so we opted to just put the screws in through the side and have them show. We used silver screws that matched the rebar so it actually looks intentional! Bonus! We adore this shelf. I haven't loaded it up yet because were moving and can't fathom lugging all my books out just to pack them up in a month and a half...but when we get settled you best believe that this shelf will be styled and loaded down with awesome books! Here's the finished product! What do you guys think???


 There ya have it! Custom built shelving to fit our needs and our budget! All in all this shelf cost me about 50 bucks to build. No joke! The restoration hardware version is like 2000!!! BAM! I'll take my version any day and I had a blast building it! So please...if you like this shelf do share. I would love to answer any questions you guys have! Oh and to finish it I used my new favey fave rust stain that I mentioned here. SO easy and makes wood look so fab! And I poly coated it with shellac a few times for protection. Done and done! :) Hope you guys have a FAB-U-LOUS weekend!
Linking with the following fab parties:


So when I got home with all my supplies my hubby and I started building. I decided to splurge and use rebar for the backs of the shelves so the books didn't fall off. I love the industrial vibe it added. And we also got some super cute small metal casters for the bottom so we could move it easily.


We were gonna use the pocket hole system that we used on our table but we just didn't have the energy and wanted it to look rustic so we opted to just put the screws in through the side and have them show. We used silver screws that matched the rebar so it actually looks intentional! Bonus! We adore this shelf. I haven't loaded it up yet because were moving and can't fathom lugging all my books out just to pack them up in a month and a half...but when we get settled you best believe that this shelf will be styled and loaded down with awesome books! Here's the finished product! What do you guys think???


Linking with the following fab parties:


