DIY book page lamp shade tutorial

So....I got really creative the other day and made something that I'm in LOVE with for my toddler's big boy room. I haven't been able to find a lamp that was both cute, and kid-like, but not too themey or juvenile. I mean...my son is only two but I didn't want cartoon character's ALL over his room. Well I happened to have an old Cat in the Hat book and decided to get creative with it. My son had destroyed and colored on half the pages and it was in a sad state so I thought I would re-purpose it into a cool lamp shade and some wall art. Ok, if anyone wants to try this at home, all you need is a lamp shade that you want to use. I used this one
 I took this picture after I took off the metal support rings that kept the shade in the round shape but you don't really have to do that. You can cover it just fine leaving everything together. I'm just showing you all the way I went about it.
Next you will need the following supplies....


 The adorable baby companion is optional of course but the other supplies are very necessary. You will need a hot glue gun, high or low melt....and LOTS of glue sticks, as well as a children's book that you want to destroy!
Next, you are gonna cut or rip the pages you want to use out of the book. I like the ripped edge look so I just ripped them out and then ripped off any parts of the pages that I didn't like. I wanted a mix of the words and the pictures so I just grabbed the pages that I really liked.
Next...Take the page you want to start with and fold over the top lip of the shade...add some hot glue so it'll stay and press the edges down so its flat and secure...it'll look like this....

 Next you are gonna glue the rest of the edges down...and then just keep on going all the way around the shade. You probably won't have pages that are long enough to go all the way to the bottom of the page like I did...if you don't...no worries....you'll just rip off extra page sections to go on the bottom and glue them down and the fold the bottom lip of those sections to the inside bottom of the shade and glue those down. You may have to rip the edge into a few sections like so...that way you can glue them down individually and get a tighter fit....


Once you have done all that you'll have something that looks like this

 After I was done with gluing all my pages down I waited till it was done and then glued the two rings (top and bottom) back into the lamp shade so it would hold its shape properly. If you don't take your shade apart like I did then you can skip this step. I then took a cheapo paint brush and brushed mod podge onto the pages. After the first coat was on I let it dry for about an hour, then brushed on another coat.
You will end up with an adorable finished product and your kids will LOVE it!


I also whipped up a book page canvas with some more mod podge and some more book pages and an old ghetto canvas that was in my garage...Tah dah!

I love it! I hope you guys all try this for your toddler's rooms...please show me if you do!!

Linking to Flaunt it Friday @ Chic on a shoestring
Join  us Saturdays at tatertotsandjello.com for the weekend wrap 
 up           party!


Pallet board into rustic chic coat rack

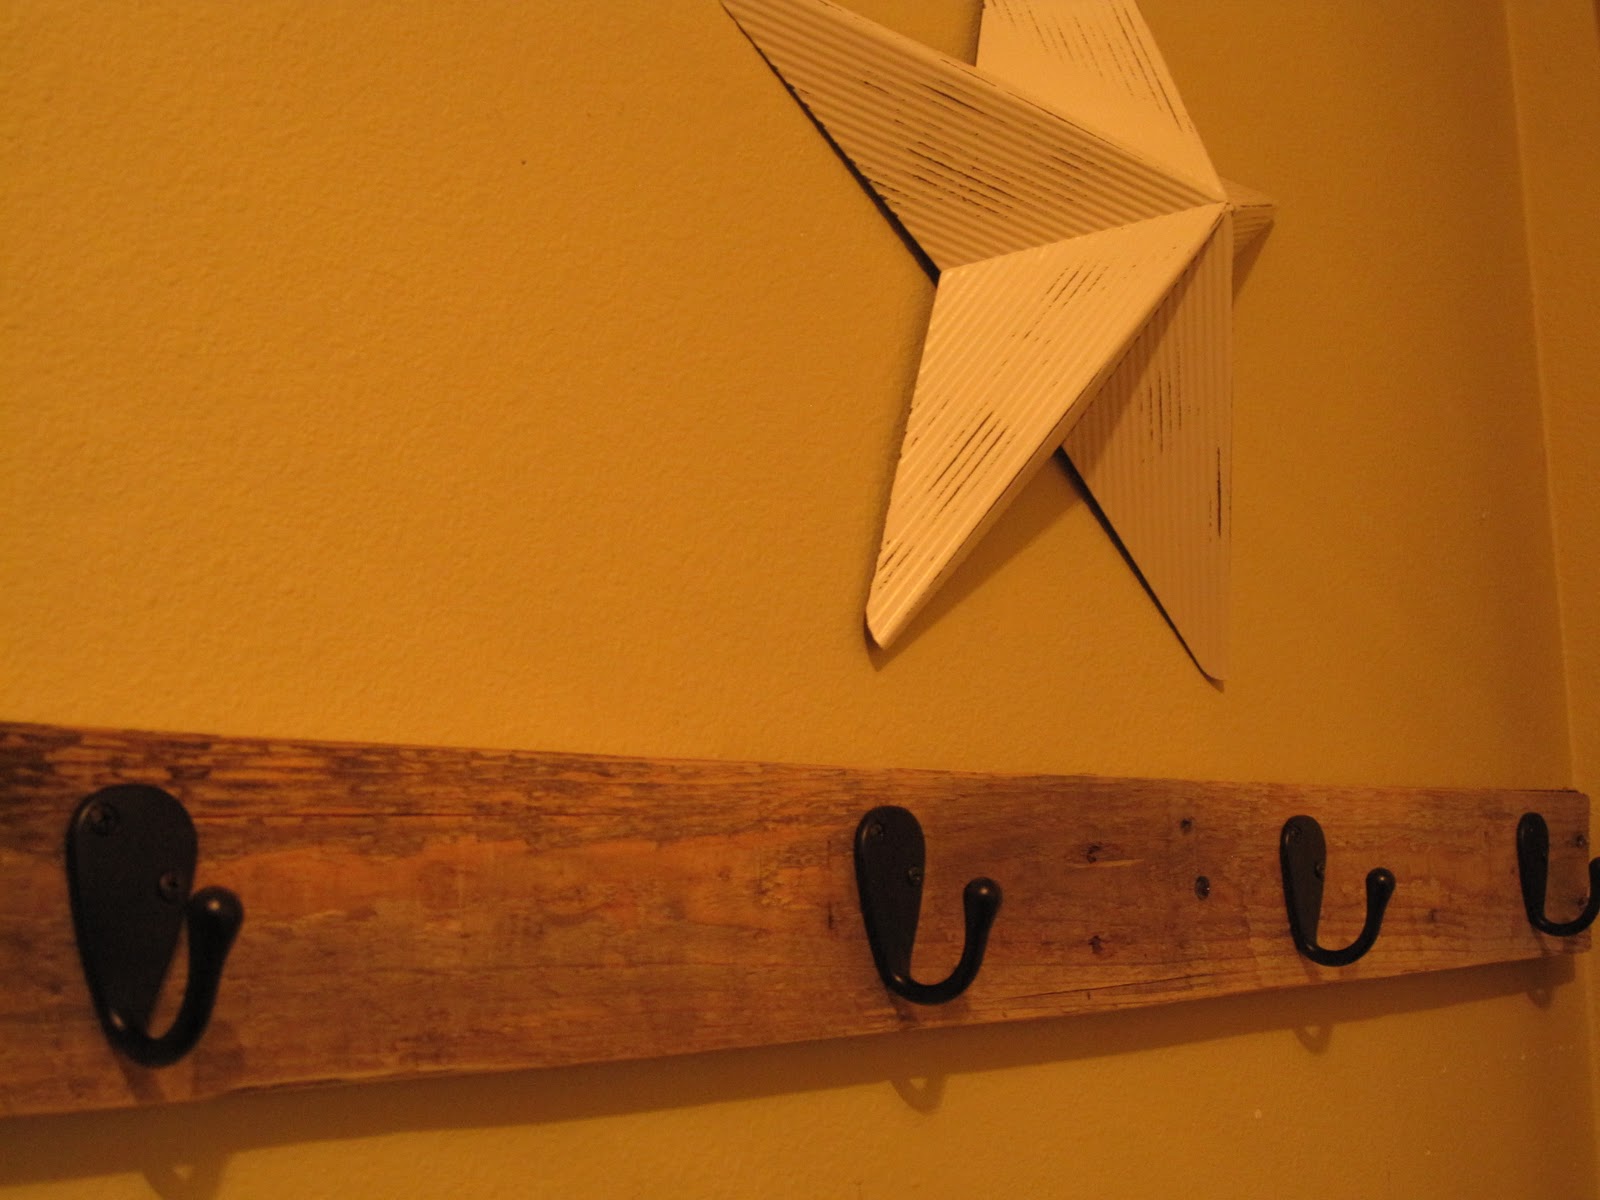
Hey all! I was browsing Ana-white.com earlier today (formerly knockoffwood) and found this amazing idea for a coat rack. Anyone besides me have a garage with a few discarded and lugged home pallets??? Well then you can make this coat rack for practically nothing! (See Honey...I knew those things would come in handy!) During nap time today I pried one of the boards off the pallet with a hammer, sanded it lightly with my palm sander to remove anything that might snag clothing, and attached 4 hooks to it. Now it hangs in all its rustic-ness on my wall to help me organize my entry way! I love love LOVE it! I was aiming for rustic-beaten up and left outside in the rain for a year-chic! I hope you all try this...its crazy easy and you'll love it! You could totally paint it to match your decor but I happen to like it with the raw wood. Pallets have so much character and the wood is always the most perfect distressed wood...you just can't recreate that! I hope you all had an awesome Christmas and New Years. Here's to an amazing 2011!!


Linking to Frugal friday at the Shabby Nest

Things you need to know about me if were gonna be BFF's

Hey All! I'm taking Littlemissmomma's lead on this one and creating my own list. There might be some TMI moments as your reading but I feel that "full disclosure" is necessary for BFF's. :) Here we go...

I can eat as much pizza as my husband (usually 4 slices)

I am a SAHM. It has been my dream since I was about 15...I've always wanted to have babies and raise them and be that kind of loving, nurturing Mom that was always there for them. I hope I'm achieving that goal.
I had an emergency c section with my son after 35 hours of labor, when I became pregnant with my daughter I really wanted to try and have a regular vaginal birth, (if any of you have tried that then you know that there is a lot of politics involved for having a vbac..vaginal birth after ceserean) well after about 14 hours of active labor I succeeded...a beautiful 9 pound baby girl delivered how I had always wanted!
 I have an enormous sweet tooth...Seriously! As soon as dinner is over I'm rummaging in the cupboards looking for sweets. I can't go into dollar tree without leaving with about ten bucks worth of candy! If there is a sugarholics support group out there then please sign me up!
I ran track all through highschool and cross country in college. Do I run now...um not exactly. I am getting into the 30 day shred by Jillian Michaels though!
I am so obsessed with rehabbing furniture that every once in a while I'll just take something that I have already refinished out into the garage and just start sanding and painting away! I can't help myself!
I just learned how to sew about 9 months ago and I am totally OBSESSED now.
I pee and pick my nose in front of my husband. We are obviously VERY comfortable with each other! lol
I could not live without designer jeans and coffee. I am totally obsessed with both!
I was a makeup artist for many years. I also do weddings and special events.
I have a brother. He's 8 years older then me. We have always been very close and are lucky to live only about 10 mins from each other.
My husband is a total computer dork...its his job...and one of his biggest passions!
I am an obsessive copy cat. I feel so uninspired sometimes and then I look at all of your blogs and I copy the stuff you do. Is that bad? maybe I shouldn't admit that! lol
I hate spiders!
I love change...haircolor, cars, clothing, houses...I love it all! I love a fresh start and a new look!
I am not very good with this blogging thing. Sometimes I'm majorly motivated and then I'll have a severe dry spell. Bear with me!
I am very traditional and I love love love to cook and bake and be at home. I grew up hating to cook because I come from a family of amazing cooks and I felt like I could never measure up to their skills. Now that I'm the Mama I love it! And its amazing how good you can get when you get out from behind other people's shadow!
I hate doing the dishes! Give me toilets to clean and vaccuming and laundry..but just please don't make me do the dishes! Touching wet food is one of my biggest pet peeves!
Having my legs trapped is another pet peeve. If someone pinned me down and tied my legs together I think I would probably pass out from the anxiety. no joke.
I went through some extreme anxiety when I was pregnant with my daughter and now I know what its like to live like that. Its no fun!
I majorly look up to you other ladies out there! I get so inspired by all of you and encouraged to read about your everyday lives...please keep it up...you all make me smile!!

Faux Mercury glass lamps


 I thought I'd share a project I did a few weeks ago with you all! I am sure some of you have probably seen some of the "faux mercury glass" that's been going around. It looks amazing and was supposed to be easy. Now real mercury glass...although gorgeous...has quite the price tag! And if you are like me and have a small budget but a big imagination, you too can have mercury glass! I know that it probably would've been smart to start off with something I didn't really care about..such as a free florist vase...but I'm not always the most logical and I tend to just dive in to projects! I had a couple glass lamps that I was dying to try to make into mercury glass. Here is a tutorial of sorts on how to do what I did.

Materials you will need:
Glass lamp or votive holder or vase
Spray bottle of water
A couple colors of silver spray paint (i used Krylon's Brilliant Silver and Matte Aluminum)
Paper towel for cleaning drips and newspaper for setting stuff on to dry

To get started, you will need to clean the inside and outside of your lamp as well as possible. I used a dry paper towel because mine were mostly clean...just a tad dusty. Once they are clean and dry you will tip the lamp upside down so the open bottom is facing up. Balance the lamp (on top of several sheets of newspaper) resting on the top part that the bulb screws in to..whatever that is called! Take your spray bottle and spray water into the inside of the lamp. The idea is that you want to see visible water droplets on the inside. Right after spraying the water, grab one of your cans of spraypaint and star spraying the paint on the inside only...right over the top of the water drops. I found that the paint will kind of billow around inside of the lamp and then settle after a couple mins. I used one color and sprayed several good sprays inside the lamp, and then grabbed the other color and did the same thing. I then tipped the lamp right side up and let it sit on the newspaper and dry (water and paint will run out...that's ok) After 10 mins or so (it was a warm day so it dried quickly) I came back, tipped it upside down and roughed up the paint with a chopstick (mercury glass looks weathered and uneven and spotty...that's part of the appeal) I made scratches and holes in the paint to give it a distressed look. Then I sprayed it again with water and then did the paint treatment a second time. After I was done I let it dry the same way as before. Make sure that after you tip it right side up and let the water drip out that you clean up any paint that gets on the outside...if you let it dry its a pain to get off.
Let the lamp (or jar or whatever) dry thoroughly and then its ready to use! I absolutely love how this turned out. It was so easy and is really unique looking. This would be great to do to votive holders or wine glasses to make a sparkly holiday centerpiece! If you do this to a candle holder (which I HIGHLY recommend) you will be in Looove! It looks amazing with a tea light twinkling inside! Hope you all give this a try...its so easy and really fun! Happy Thanksgiving!!!

Looong time no post...

Hello all! Sorry for my extreme absence lately! I've been up to my elbows in dirty diapers and totally neglecting my beloved blog! I've been working on a few projects lately that I will be posting pics of once I'm done with them. First off....
My original plan when my baby girl came along was to have her and my 2 year old son share a room. I figured, why not, they'll get used to it and it'll be no big deal for them! Well it was no big deal for her but it was a BIG deal for him! After trying the roommate thing for two nights and having my 2 year old be up till midnight on both nights and waking up at around 6am I had to cut my losses! He just couldn't sleep through her gurgles and little baby noises...nor did he find them as adorable as I do! He loves his sister but he needs his own room. That's just how he is. So we put her in our guest room which is also my sewing room. She's only 3 months...she doesn't need much space...so we kept the full sized guest bed in there and I moved my sewing table into the closet which actually works great! The room is super cute and is a totally combined space that works really well! Granted we haven't had guests sleep in the bed with her in there yet and probably won't, but that bed will come in really handy if she's sick or teething and needs her Mama close by.
I will post pics of her room soon. I'm totally stumped by wall art because I want it to be a room fitting for a baby girl without being too baby-ish...because its also a guest room. Ya know? Its a dilemma!
My next project that I've been working on is transforming my son's room into a "big boy" room! I scored a really nice toddler bed on craigslist for free. Its solid wood and really durable but didn't have all the hardwear, or the slats that the mattress was supposed to sit on, and was really REALLY scratched. I sanded it down and spray painted it with Krylon's Navy Blue. It took 3 and a half cans to get it fully covered! Once it was totally covered and had dried overnight I realized that the color wasn't exactly what I was after. I wanted it to have more of a dusty color and the blue was a little too bright for me. So I dilluted some black paint by half with water and dry brushed it on over the blue. It didn't look like anything at first but once one coat had dried it was exactly the color I had been after! Next I need to find some bedding that I like in the colors that I'm after...its no easy task! I'd love some color help! (The walls of his room are kind of like a key lime pie color. They came with the house and the paint was in good shape and we didn't hate it so it stayed! lol...since I was 8 months pregnant when we moved in...the less I had to do the better! ) The colors that I've chosen for his room are Navy blue, dark red, chocolate brown, and white. I would love to find toddler bedding in a cute plaid or something. Nothing with animals or cartoon characters on it! I don't do themes! And art? And storage? Need all the help I can get!
I hope you all had an awesome Halloween and are hunkering down for the crisp weather that were having! Can't wait for Thanksgiving and Christmas...they are right around the corner!

Dresser re-do

Hey Everyone!!! Just wanted to share the dresser that I just finished....I love how it turned out! I was originally gonna paint it white with the stained ebony top but at the last minute decided to go with a creamy light blue green insead...I adore it! I hope I can sell it to someone that will love it as much as I do!

I did it again and didn't take a before picture....this dresser was THRASHED...I mean scratched...dented...chewed on...you name it! It was scored free off of craigslist and when I got it home I realized that one of the handles was missing...so I grabbed a couple of knobs from my stash and spray painted all of the hardwear a glossy black. For some reason the blueish color is coming up more white in pics....oh well you get the idea! Hope you all like it!
Oh...and on a personal note...I have 50 followers!!! That means that there are 50 people out there that actually have interest in my ramblings! Wow...I feel very honored! I want to thank you all for reading my blog...it gives me the encouragement to keep up the DIY projects. You all rock!

Friday garage sale recap

SUCCESS!!!!!
Yes that's right ladies! I had a garage sale today with a few friends...it went SO well. The only advertising that we did for this sale, besides a shout out on facebook, was to put a VERY specific craigslist ad about it. In the ad I made sure to list our big ticket "draw people in" items...such as designer clothes or purses, tools, kids play center things, etc. A lot of people are scanning craigslist looking for that stuff so they might come to your sale if you list it. I also made sure to list some prices with the time and the address of course. Well when I showed up to my friend's house that was having the sale there was a line of cars waiting for us to open. I know that's probably pretty typical of hard core garage salers but I was pretty excited! (not too excited though when they started rummaging on the tables AS we were carrying them out of the garage...how annoying!) We were open from 8am-4pm and we all made a killing. Too bad all but about 25.00 of my money went to my friend who was selling A TON of designer jeans...two of which fit me like a glove so I purchased them with some of my garage sale money...and my other friend who was selling ALL her boys baby/toddler clothes so I went crazy and bought ALL of Liam's jeans, pants, sweats, sweatshirts, shirts, shoes, etc that he'll need for probably the next 9 months or longer!! She was selling majorly awesome name brand boys clothes for DIRT CHEAP! I couldn't pass it up. And as we were packing up the sale, because there was some stuff that neither of my friends wanted to take home (housewares, picture frames, decorations, clothes, lamps, etc.) they just gave me A TON of stuff for free. So to recap...got rid of a TON of stuff...made practically no money in the end...walked away with GREAT stuff that my family really needed (well except the designer jeans...those I just wanted BAD)...All in all I'd say a successful sale! 
Oh and most of those decorations that I got for free I'm planning on spray painting and doing fun things with...I'll be posting a follow up post when I finally get around to it! Hope you all have a fabulous weekend!!!