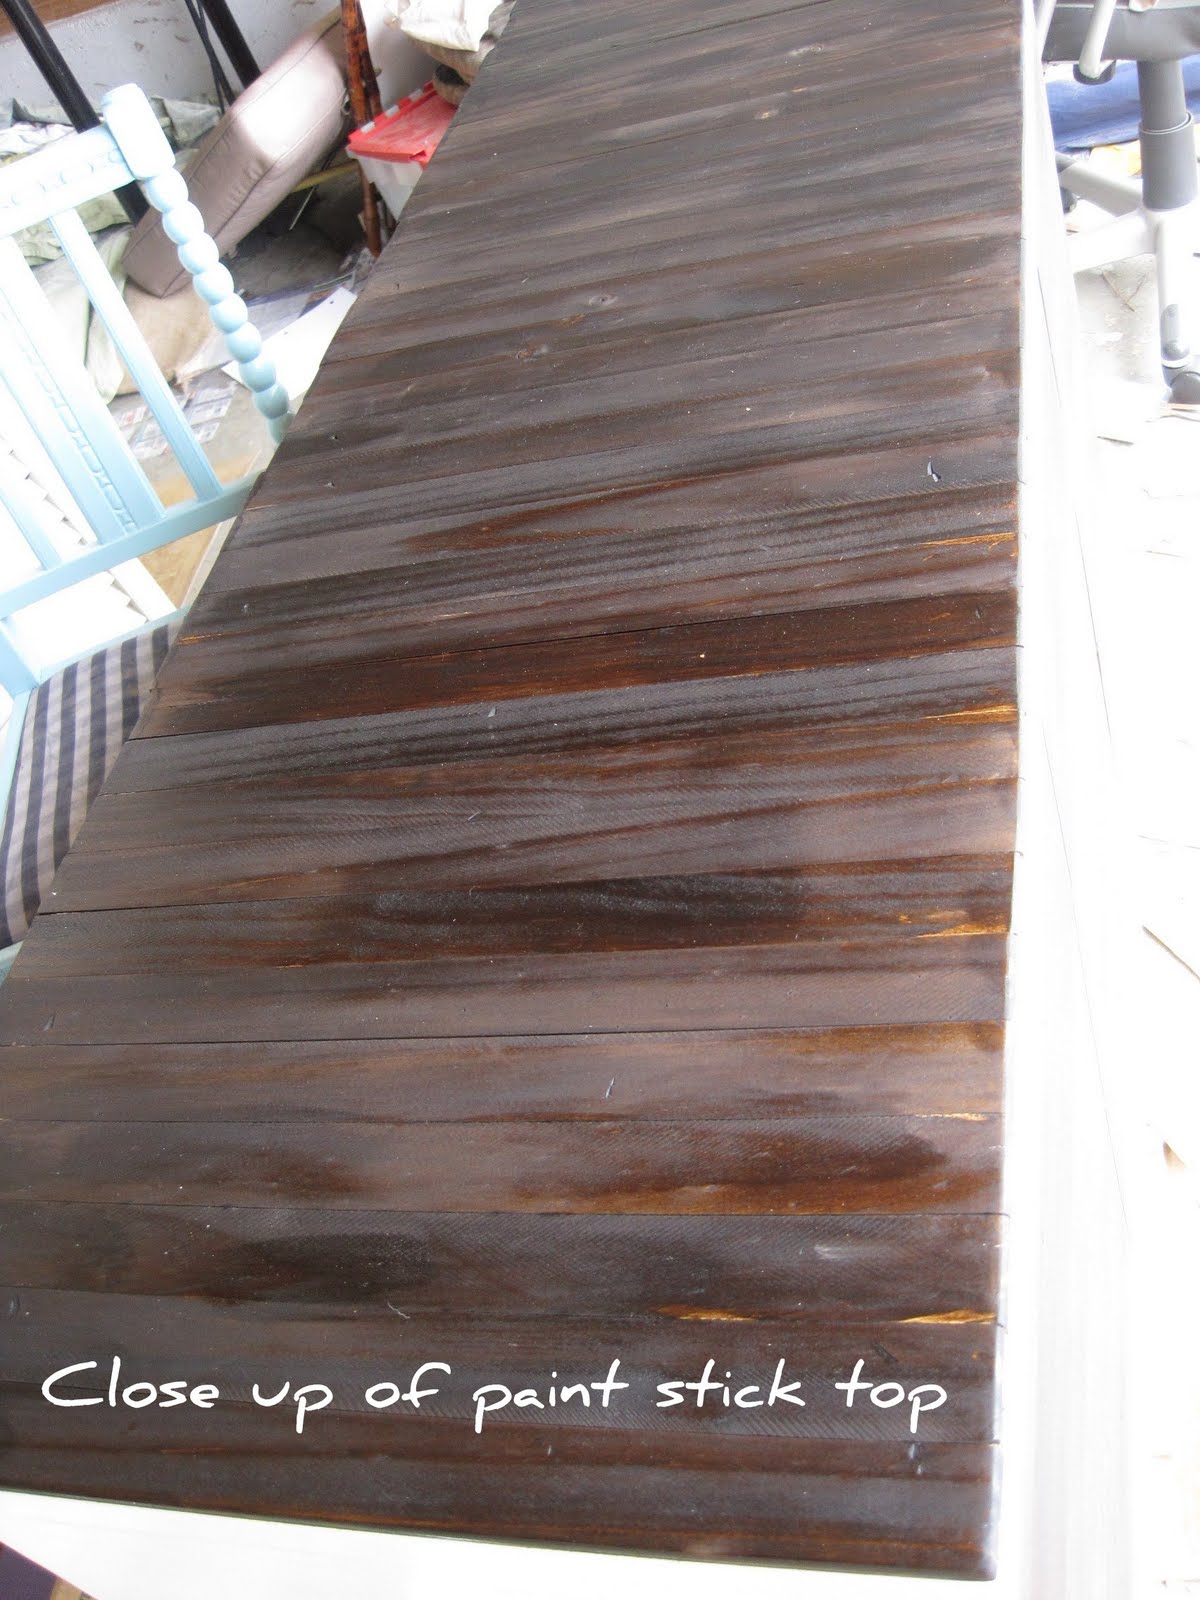
After I stripped ALL the laminate off the dresser on the fronts, top, sides, etc I sanded it all down really well...starting from 80 grit and then 120...so that I had a nice smooth surface to start with. I then put on a thin and even coat of primer on the dresser body but left the top and drawer fronts bare since those were gonna be stained. I didn't take a picture of this step but I just made sure the primer coat was light and even...I prefer Zinser primer...its what Centsational girl uses...and it really does work awesome. Super grippy and smooth looking under the paint. I let the primer dry over night and in the meantime I stained all the drawer fronts with Minwax liquid stain in Dark Walnut. I only did one coat on the drawer fronts...the wood was really pretty underneath and I wanted that to show thru a bit. I then laid out my plank top (paint sticks) and started gluing. There isn't really any rhyme or reason to applying the top. I just drizzled Gorilla wood glue liberally on the dresser top a little at a time (it dries fast) and then put the sticks evenly on the top...making sure that they were smooshed up next to each other completely before moving on to the next one. I also used paint cans to keep them flat during the drying process. As they dry the ends tend to lift a little...make sure you put something heavy on there and really concentrate on keeping the ends flat. Here she is with the unfinished paint stick top..


TA DAHHHHH!!!!!! Ok so you guys are probably wondering what I used for my handles on the dresser...well that was kind of a happy accident. I searched all over for modern handles that fit the overall look that I was going for, were cheap, and just happened to have the same width holes that the old ones did. Well I couldn't come up with anything that would work. I was majorly bummed and thinking that I would have to drill new holes and just settle for something that I didn't really love...when I remembered seeing different dressers that people have done that use rope or ribbon in place of handles in the drawers. Well that sparked a MAJOR bonfire of creativity and I remembered that I had a huge bundle of scrap leather pieces that would work AMMMAAAAZING in place of handles....plus they are stiff and will hold their shape well! Yay for using what you already have!! The leather pieces that I have are strips...all the same length so all I needed to do was cut them each in half and use one half for each handle. I widened the holes in the drawers just a tad so I could get the strips (which I trimmed the ends a bit to get it to fit) through the holes. Once I had about 3/4 an inch through each hole I simply folded it flat against the inside of the drawer front and stapled it firmly in place. I did this 9 times...and MAN was it tiring...especially with my kids running around me the whole time! The payoff was HUGE though and I could not be happier with how it looks! Its a little modern...a little funky...and it was TOTALLY FREE! I hope you guys love it as much as I do! I'd love to hear your thoughts!!!
Partying it up @


All things furniture @ Perfectly Imperfect


Paint sticks??? Who woulda thought, seriously??? I love it, I just love it. The finished product is amazing!
ReplyDeleteReally beautiful job!
ReplyDeletekelsey that looks AWESOME! i love the dramatic finish! and thank you for your comment on my dresser today- it made my day!
ReplyDeleteNice makeover for this great piece. Thanks for sharing! I'm your newest follower and hope you'll follow me. Thanks!
ReplyDeleteHelen
A girl after my own heart! I am a paint stick gal too! Love the idea! Please visit my paint stick projects! Oh and I am your 100th follower!
ReplyDeletedreaming-n-color.blogspot.com
And I'm your 101st follower! GREAAAAAAAAAAT JOB on the dresser! Wow!
ReplyDeletethat is SUCH an interesting piece, it looks like it took a looot of work. i love the differnt color/tones, that's my new favorite thing! great job on this!
ReplyDeleteWhat a makeover!!! I love it....and love the paint stick top....whoa. Definitely featuring this one...love it!!
ReplyDelete:-)
shaunna
I love the richness of the dark color! paint sticks? very creative!
ReplyDeleteI LOVE gorilla glue!
gail
This might be your most creative project yet. I LOVE it!!!
ReplyDelete